Soil sampling to depth in horticulture
Rob Dwyer – IPF Tropical Systems Agronomist
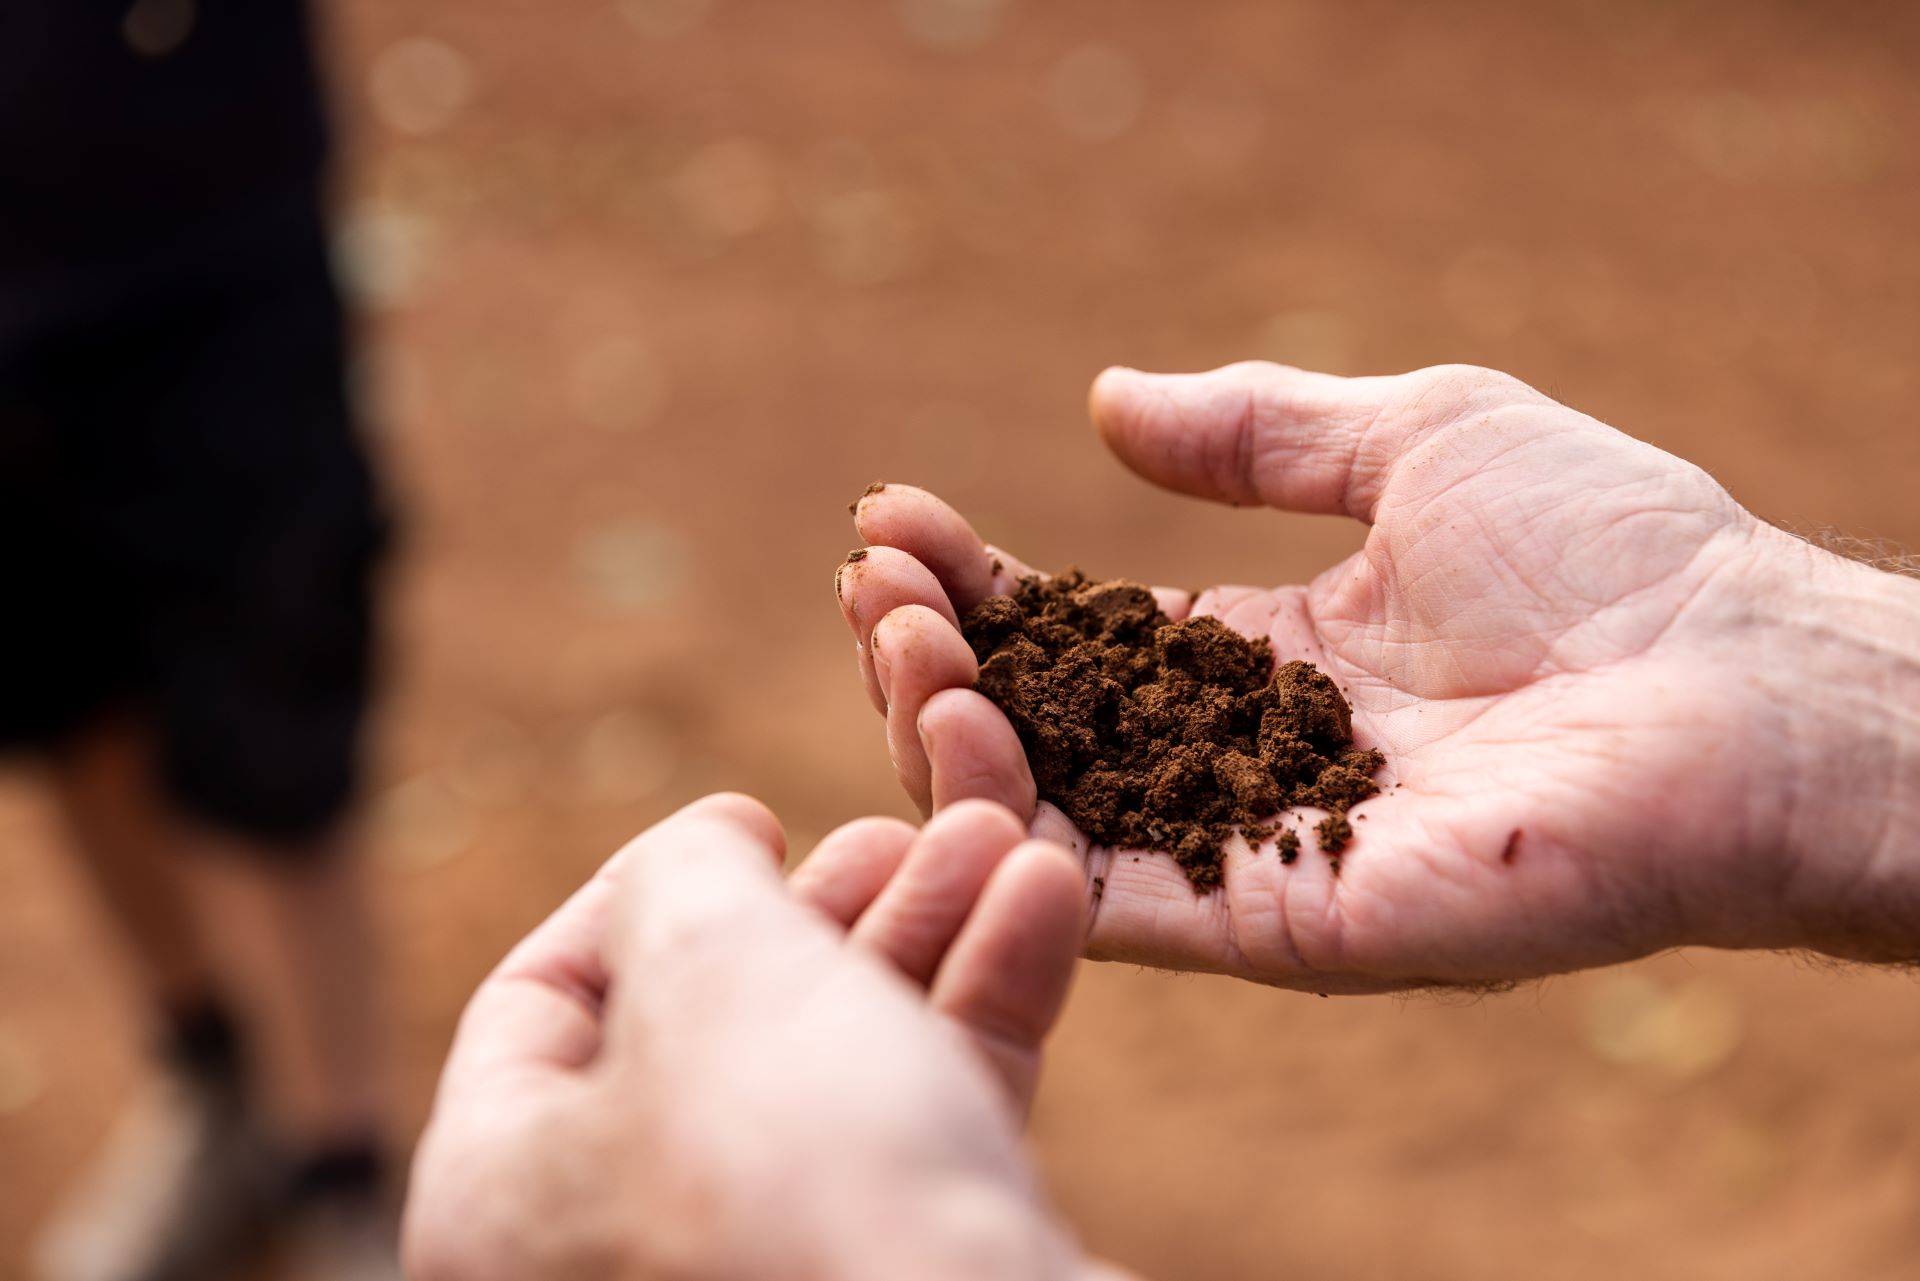
Surface soil tests have been a mainstay in the ever-expanding management toolbox of horticulture growers, consultants and agronomists, but deep soil sampling plays an equally important role.
Exploring a soil profile to greater depth can help uncover answers to many crop-related questions and clarify crop performance. Productivity is closely linked to conditions deeper in the soil profile. There are several key steps to ensure accurate deep soil sampling, and the “6 Rs” can be a useful guide:
- Right depths
- Right depth band/s
- Right sample location
- Right time
- Right test & test codes
- Right approach to soil sampling
Right depths
Surface soil test depths are reflective of most root activity. Surface samples correlate to the depths research was conducted at, so this depth equates best to nutrient response and also applied fertiliser requirements.
Table 1 shows correct surface test depths. The ‘bottom-end’ of the surface test range is the most logical depth to start the ‘top-end’ of the first deep soil test depth range or band. Refer to Table 2 for the recommended deep soil sampling depths.
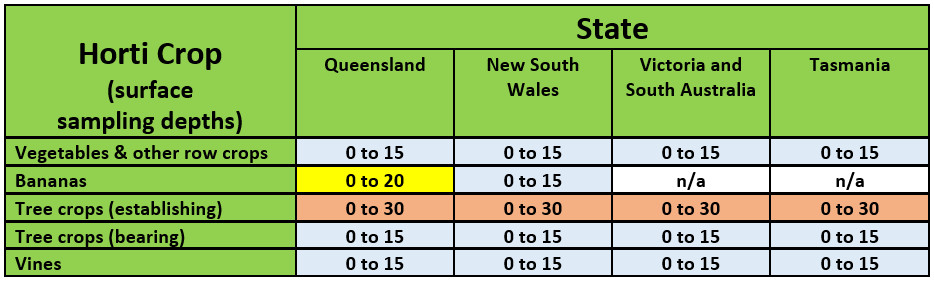
Source: A guide for ‘fit for purpose’ soil sampling.
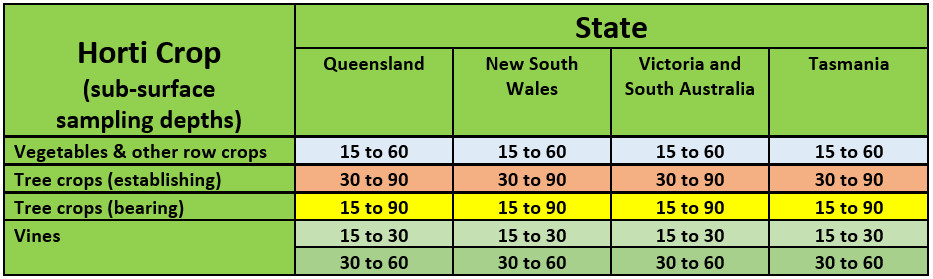
Source: A guide for ‘fit for purpose’ soil sampling.
Right depth band/s
The suggested depth ranges for deep samples are, again, great starting points. However, they can be modified if required – especially to identify and manage sub-soil constraints.
In any horticultural crop, diagnosing subsoil constraints can be helped by digging a soil trench and coupling visual characteristics with physical and chemical characteristics. Being able to see soil horizons or other sub-surface changes, can more accurately inform you about how to better implement the most appropriate subsurface sampling regime. See Figure 1 below.

(Source: Soil-specific Nutrient Management Guidelines for Sugarcane Production ‘Isis’ & ‘Bundaberg’ Districts).
More and narrower sampling bands will provide more information and support decision-making. The soil trench will reveal appropriate increments for sampling and it’s best to be flexible to what it reveals. See table 3 below.

Reasons to narrow the sampling band include changes to:
- soil horizons
- colour
- texture
- organic carbon
- pedality
- mottling
- aggregate presence
- nodule presence
- absence of plant roots
- appearance of a water table
Equally, there can be many reasons that are not obvious for narrowing the sampling band, and this is where appropriate soil testing analyte selection is important. These include changes in:
- plant essential nutrients – both macro and trace elements
- pH
- sodicity
- salinity
- chloride
- aluminium saturation
- manganese and other trace element toxicity, including zinc and boron
- dispersion
- slaking
- cadmium and other heavy metals
It all comes down to matching as closely as practical the known and unknown variations, with the number and width of the subsurface sampling bands. More appropriate sampling allows for more appropriate management. This is especially true when sub-surface measurements are taken over time, allowing trends to be observed. These soil insights can become priceless for evaluating the appropriateness of nutrition programs over the longer term. Often depletion and over-application scenarios can be identified earlier by tracking sub-surface trends. Even details associated with irrigation management can be gleaned.
Right sample location
The best location to sample depends on how the information derived is going to be used. If only intending to identify and correct a productivity limitation, samples may only be collected once to allow comparison between the ‘good’ and ‘poorer’ productivity zones. A normal randomised collection sampling protocol can be used in these instances.
If looking to determine trends over time, a more rigorous sample site location process may be required, as this can become a permanent sampling site. Having a permanent sampling site may reduce variations associated with differences across sampling methods. Once again, a comparison between ‘good’ and ‘better’ productivity zones need to be determined. This can be achieved by using the likes of soil maps; productivity differences; quality differences; or precision agriculture determinations, like EM surveys & mapping. Apply whichever is more appropriate for the crop and management circumstance.
Right time
In annual horticulture, the most appropriate time would be as soon as practical prior to planting – allowing for sampling, analysis, interpretation, and recommendations to be made. Depending on the crop and farming system, farming operations may have to include the time associated with sequential plantings and putting down irrigation tape or mulch, in advance of transplanting.
In the establishment of perennial horticulture, a time that allows ‘enough’ time is best. If subsoil constraints are known to exist (or identified during the establishment process) sufficient time to allow ameliorants to take remedial effect and correct the constraint before planting is a very important consideration. Additionally, growers should consider if earthworks for levelling, mounding, drainage, contouring, drain lines or runoff management are required. The extent and depth of subsoil constraints can influence establishment costs and ongoing productivity concerns. This process assists with determining if topsoil has to be stockpiled, the subsoil worked and topsoil re-distributed.
In bearing perennial horticulture, often linking soil testing with the time corresponding to plant tissue sampling is a good time.
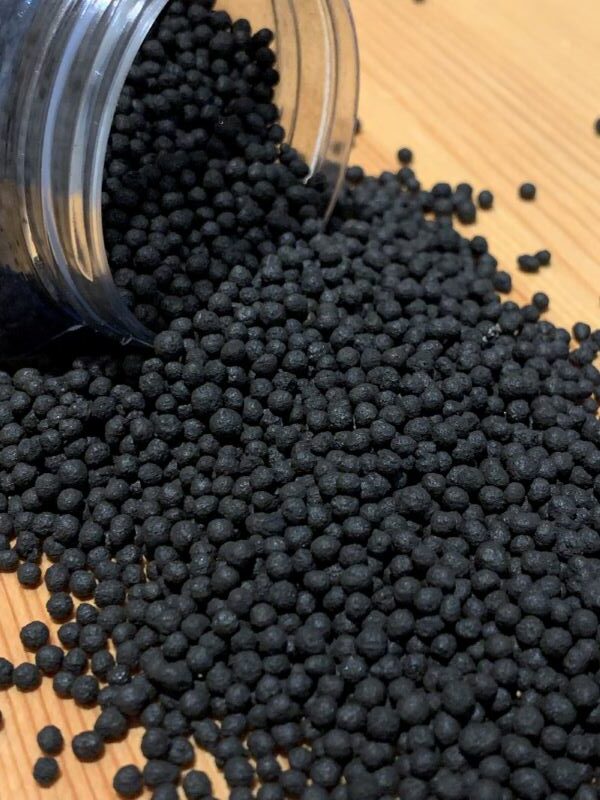
Right test & test codes
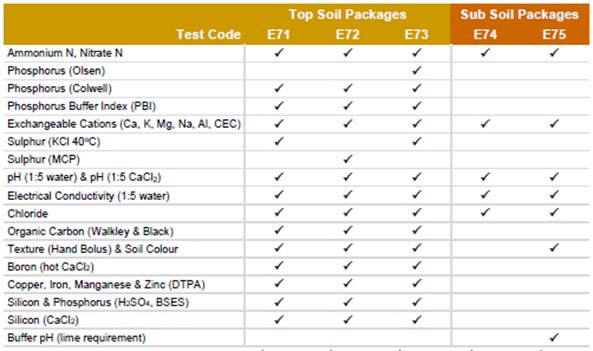
Nutrient Advantage already provides several soil testing packages for both surface and sub-surface soil testing. Refer to Figure 2 below. If required ‘add-on’ test codes can be included individually or in multiples. There is even the flexibility to create ‘custom soil packages’ to meet ongoing soil testing requirements. This can all be handled by Nutrient Advantage.
Crop nutrient and fertiliser recommendations can only be performed on ‘top soil packages’ collected to the correct surface sampling depth. However, there is insightful details & potentially great value to be uncovered by combining ‘top soil packages/test codes’ with sub-surface samples. The E71, E72 & E73 ‘top soil packages’ include phosphorus, sulphur, organic carbon, trace elements and silicon determinations that the ‘sub soil packages’ do not. If these tests could provide a more informed management decision, then why not use ‘top soil packages’ for sub-surface testing.
Right approach to soil sampling
To achieve successful outcomes there are three key right approach steps to address – planning, sampling, and dispatch (see Figure 3). Each of these steps must be done correctly to achieve sound outcomes from soil testing and the subsequent recommendations that follow.

Further Information
For more information, please feel free to contact me 0428 111 471 or email: rob.dwyer@incitecpivot.com.au
References
Guidelines for Sugarcane Production in the Bundaberg District’.
Panitz et al., (2014). ‘Soil-specific Nutrient Management Guidelines for Sugarcane Production in the Isis District’.
Gourley & Weaver, (2019). ‘A guide for fit for purpose soil sampling’.
Fertilizer Australia, (2020). ‘Accurate soil sampling’.
Resources
DOWNLOAD INSIGHT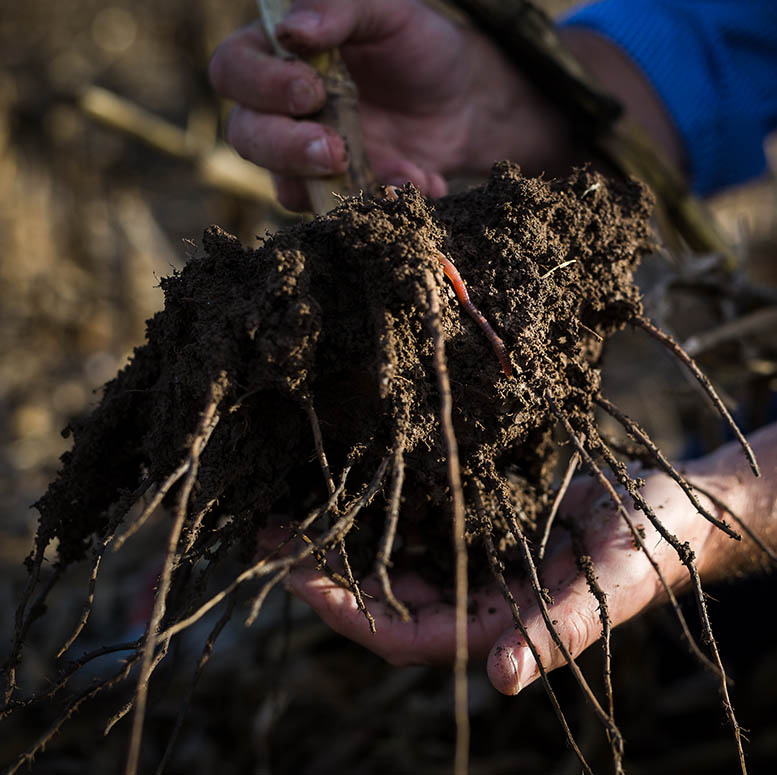
Horticulture, Pasture, Sugar, Summer Crop
Poor Soil Structure – Have you identified if it is costing you profitability?

Horticulture, Pasture, Sugar, Summer Crop
Take the next step with leading Agronomy in Practice course
Horticulture
Triggering better potato yields with soil health improvements